Build and Push a NextJs application to Docker Hub using GitHub Actions
Today I will show you how to build and push your NextJs application to the docker hub using GitHub Action. We will write a CI/CD YAML pipeline and describe each step.
Mushfikunnabi Nijhum · · updated September 12, 2023 · 6 min read
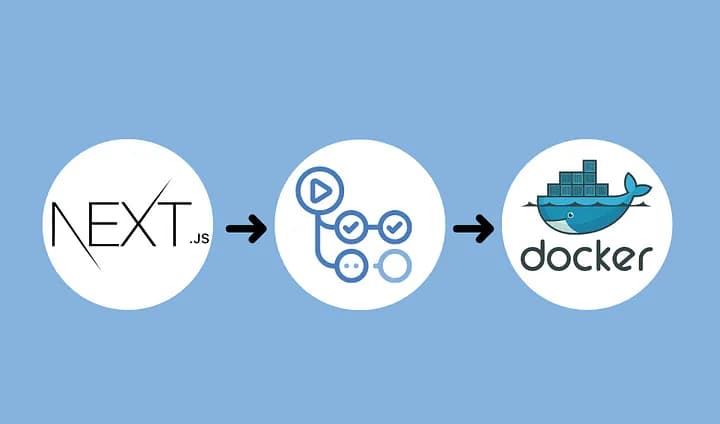
Build and Push a NextJs application to Docker Hub using GitHub Actions
Today I will show you how to build and push your NextJs application to the docker hub using GitHub Action. We will write a CI/CD YAML pipeline and describe each step.
About the NextJs Application
For this article, I will use my personal portfolio which is a static single-page website. It is built with NextJs and Tailwind CSS. In this blog post, we will just discuss how to push this project to the docker hub only.
Assuming you already have some application built with NextJs and your Dockerfile is written already.
Step 1: Creating a YML file
In your project root directory create a folder named .github and inside that folder create another folder named workflow . Finally inside workflow create a yml file.
Folder Structure
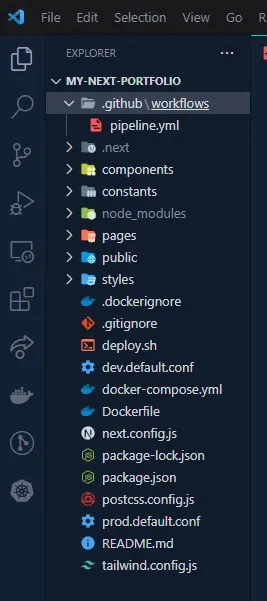
In my case, I named the yml file like pipeline.yml as you can see above.
Step 2: Writing the **yml** file
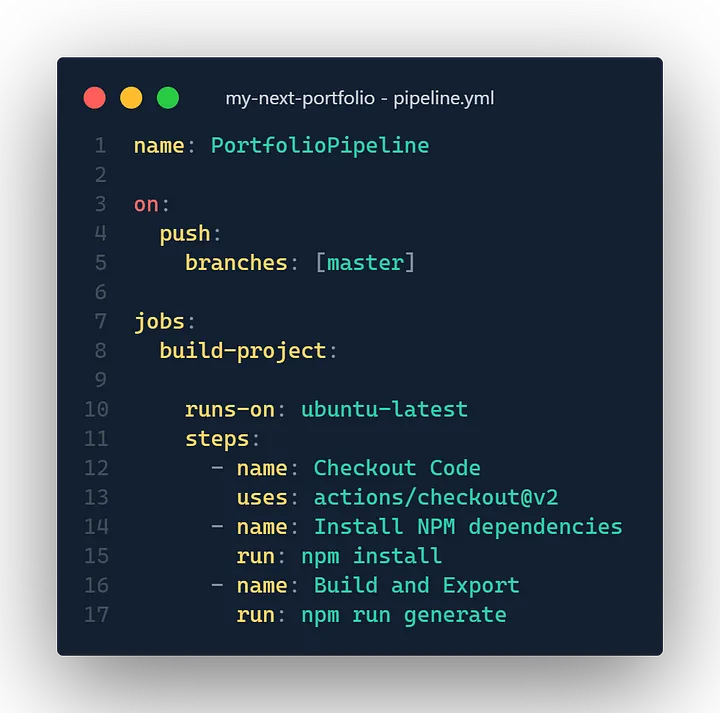
To write a YML file, we must follow some structures/rules, and steps. In order to make the steps easier to understand, I have divided them into two parts. My first step will be to demonstrate how to build the NextJs application, followed by how to push it to Docker.
Step 2.1: Building the NextJs Application
Build NextJs Application
First, we need to specify the name of the Pipeline. This can be anything. In my case it is PortfolioPipeline . Next, I am specifying when this pipeline should run. You can understand from the above code snap that, my pipeline will start running whenever I push my code to the master branch as I have specified using on: , push: and branches keywords.
Now we need to specify which jobs will run when I push into the master branch. Under the jobs: keyword, first I am naming the job as build-project: which runs-on: ubuntu-latest . You can specify the OS version as your wish. Finally, there will be some steps: that the job will perform.
-name: specifies the step name which in my case is Checkout code . Next, I am specifying the action using the uses: keyword. The actions/checkout@v2 will automatically switch to the desired branch that we mentioned at the beginning of the ymlfile.
Our next step is to install the npm dependencies of our application. You can see I have written the name: of the step and except using the uses: keyword, I have used the run: keyword. Whenever you want to run some bash command you need to use the run: keyword. Here, npm install will install all the dependency packages of my application.
The final step of this current job is to build and export our application. Again I have a name: keyword and a run: keyword that runs the npm run generatecommand. In case you are wondering what the generate keyword does, take a look at the below screenshot.
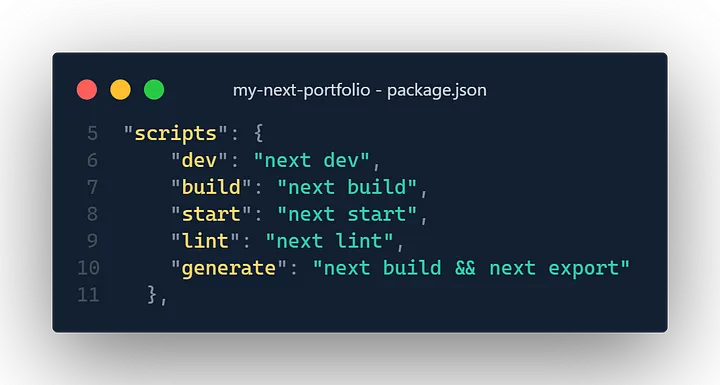
This generate keyword will actually run the next build && next export command as I have specified in my package.json file.
Please note that to write a
.ymlfile indentation is mandatory otherwise you will encounter some errors.
Now, time to push our code to GitHub to see if our first job: build-project works or not.
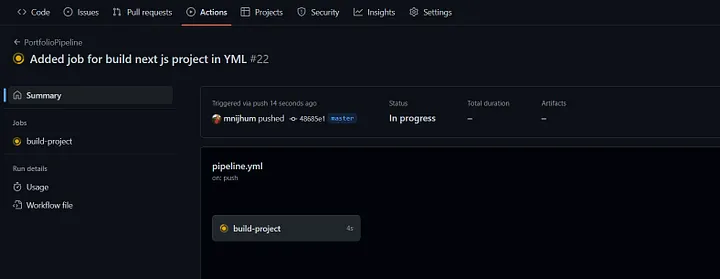
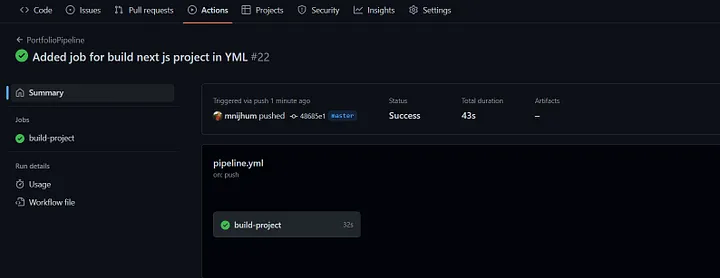
After pushing to the master branch of my git repository, we can see in the GitHub Actions tab, our build-project job is running. If you do not encounter any errors, you will see a green tick mark that your job was executed successfully.
Step 2.2: Building docker image and pushing it to the docker hub
Now, we will go back to our pipeline.yml file and will write another job that will build a docker image and will push it to our private docker repository.
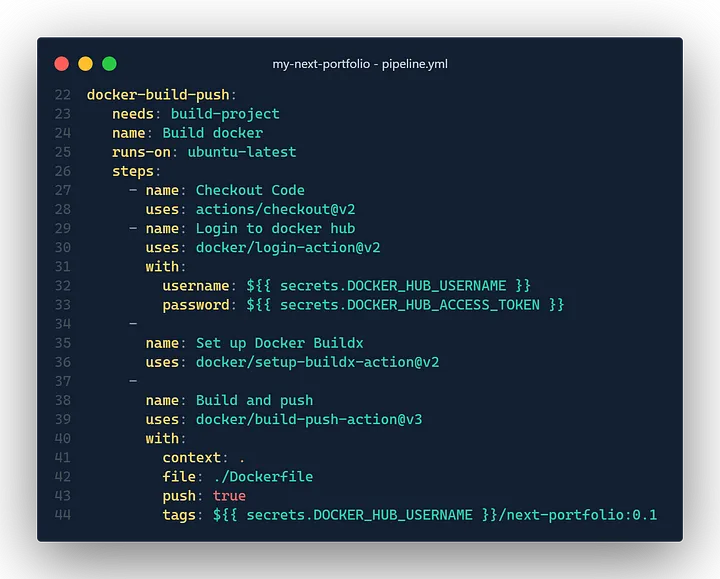
Under the jobs: section I have written another job and named it docker-build-push . You can see there are some new steps and new keywords. No worries! I will explain all of the new keywords and steps.
The need: keyword is to specify that, this job will run only if the build-project job is executed successfully. If our project is not built successfully, the Dockerfile will not work.
Like the previous steps, first, we need to checkout out our master branch. Now, we need to log in to our docker hub. The Login to docker hub step uses docker/login-action@v2 GitHub action to automatically log in to our docker hub with username and password .
You may be wondering what are those
secrets.DOCKER_HUB_USERNAMEandsecrets.DOCKER_HUB_ACCESS_TOKEN. Well, to sign in to our docker hub GitHub need the credentials. But we can not just type our credentials in the.ymlfile in plain text. For this reason, there is an option in the repository setting calledsecrets.
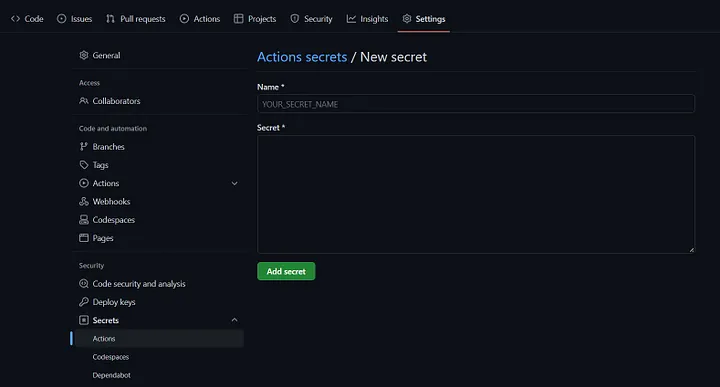
There you will find another option to add new secrets. Just give it a name and type the secret information there.
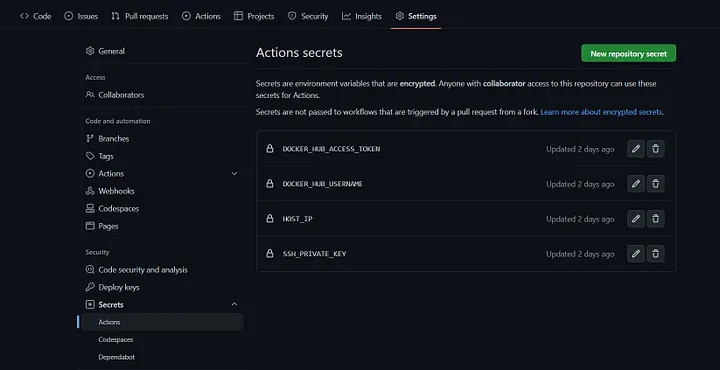
You can see, I have set a bunch of secret codes there.
Next, we need the Docker Buildx package to monitor the logs of docker if it encounters any error using docker/setup-buildx-actions@v2 action.
Finally, we will build our docker image and push it to the docker hub. For this, we will use docker/build-push-actions@v3 action with:
context: . points to the root directory of the project
file: ./Dockerfile specifies the Dockerfile in the root directory
push: true initiates push to the docker hub
tags: ${{ secrets.DOCKER_HUB_USERNAME }}/next-portfolio:0.1 specifies the docker hub repository name and tags.
Now, after saving the .yml file we will push again to our GitHub master branch and go to the Actions tab.
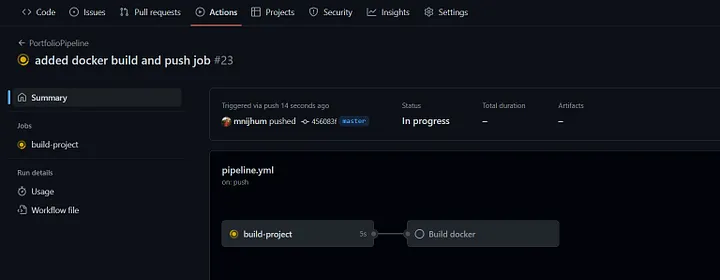
As we can see, our first job has started and the second job is waiting for the first job to finish.
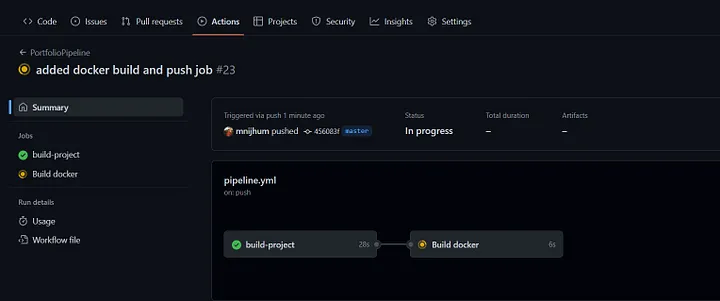
As soon as the first job is finished successfully, the second job has started executing.
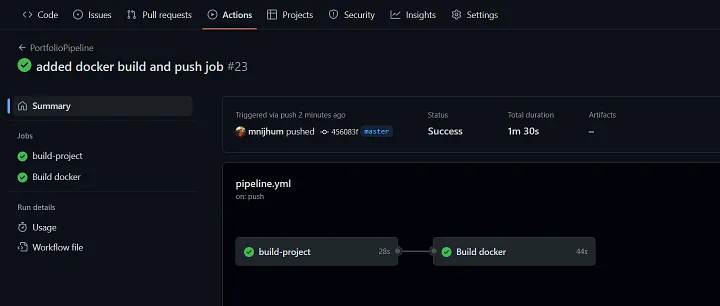
Both of our jobs are finished successfully and it took a total of 1m 30s to finish.
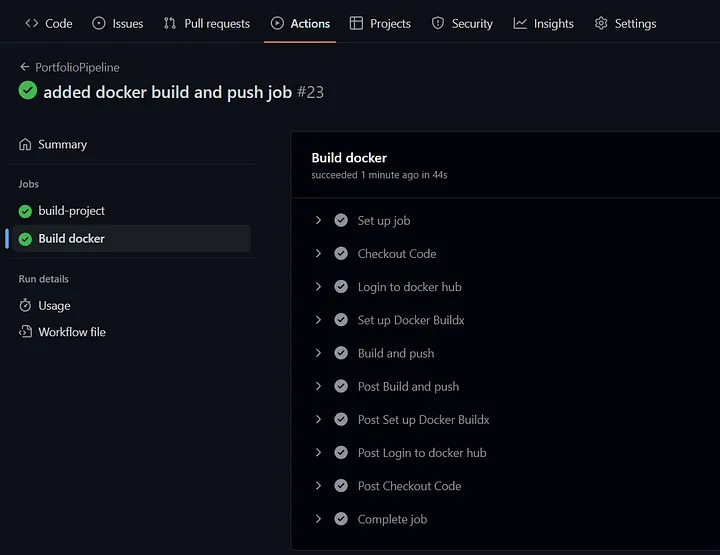
If we click on any of our jobs, we can see the steps it has gone through that we wrote in the YAML file. All of them were executed successfully.
Now let’s check our docker hub if there is any update or not.
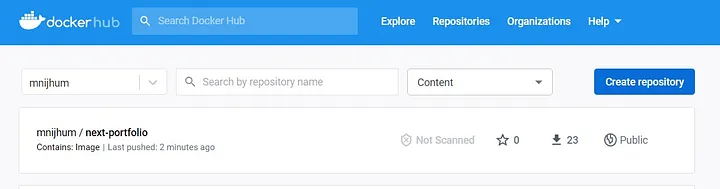
Yes! we have successfully pushed our docker image to our docker hub. Now we can use this image to deploy our application to any Virtual Machines and that too can be done using GitHub actions. I will try to write about that soon.
Thanks for reading. This was my first blog in the medium. I hope it could help you guys. If you encounter any error feel free to comment below or contact me.
Was this useful? A like tells me what to write more of.
Related posts
· 3 min read · 15 reads
Get familiar with Kubernetes Architecture
In the world of Kubernetes, a cluster is a collection of nodes or servers using a shared network to communicate between each other.
· 1 min read · 20 reads
Hello World!
The very first program we write is the great `Hello World!` and this is my first blog on my own made blog website 🤩. I am excited to share with you the journey of how I made this site and the technologies that I used to bring it to life. Let's dive in.
Comments (1)
Tasnim Alam
This is a good read & learnt about deployment very easily & quickly from this blog.